To add an audio visualizer to a video background in VisualizerWave, load your song, add the video as background media, choose its trim and playback behavior, then place the reactive graphics and titles above it. Export the composition with Realtime. The background video stays muted; the separately loaded song drives the visualizer and supplies the soundtrack.
This produces one finished video with the background already included. If you need a separate bar clip for an existing edit, use the music bar overlay tutorial, which covers external compositing and Screen blending.
A moving background with room for the music
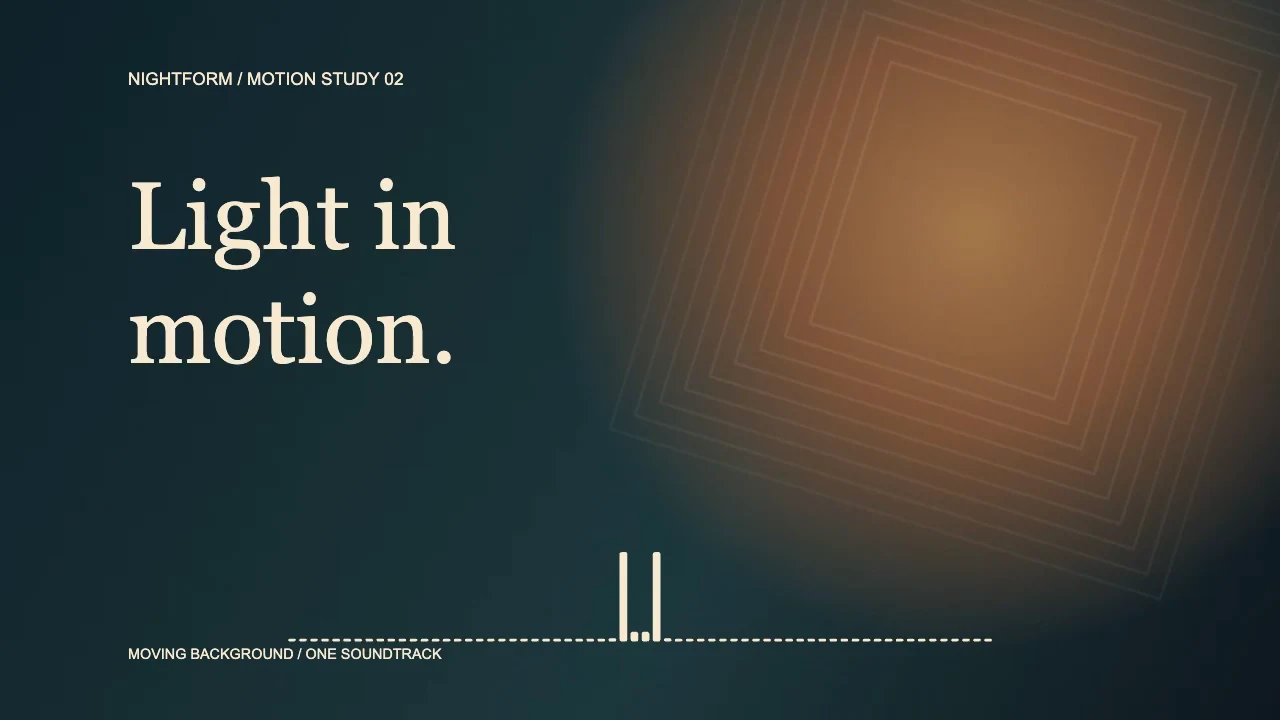
About six seconds, 1280 × 720, with a 30 fps recording setting. This is an actual VisualizerWave Realtime export using an original geometric motion graphic as the imported background. A private diagnostic recording drove the bars; the entire audio track was removed from this public example. The graphic is an authored animation, not camera footage.
The project keeps the title on the quiet left side, the moving light on the right, and the spectrum below both. You can apply the same arrangement to your own studio footage, landscape shot, or performance clip. Choose a shot with enough clear space for the information you need to show.
| Part of the example | Setting |
|---|---|
| Canvas | Landscape, 16:9, 720p |
| Background source | Four-second original motion clip |
| Background selection | 00:01.0 to 00:03.0 |
| Playback | Loop it |
| Background Dim | 0.25 |
| Visualizer | Classic starting template, Bars style |
| Bars | Cream #F9EAD2, gradient off, Movement 0.65, Scale 0.65 |
| Output method | Realtime MP4 in desktop Chromium |
These values describe this composition. Preview your own song and footage before copying the response or placement settings.
1. Prepare the song and the video separately
Use the finished mix you want people to hear. Load it as the project's audio source, even when the background video already contains sound. In this workflow, the video's camera audio is muted rather than mixed with your song.
For a performance recording where you need the original dialogue, crowd sound, or several audio tracks, finish that audio mix first. Alternatively, keep the project in a timeline editor and use a separately rendered visualizer overlay.
Choose a video your browser can decode. H.264 MP4 is the suggested fallback when a clip fails to load. A .mp4 filename alone does not identify its codec, and a large phone recording may be more demanding than a short, resized clip. Start with a short section before committing to a full-length export.
Use your own footage or material you have permission to publish. Decide the final shape before placing text: a landscape shot may lose its subject when cropped into a vertical composition. The social video sizes tool helps choose a canvas; changing shape still requires checking the design.
2. Add the video as background media
Load your song through Media → Upload Audio File, then choose the starting template. The music visualizer setup guide covers the general import and styling steps.
In Library → Media, find Background and choose the image-or-video source. Depending on the template, that source is labeled Image or video or My image or video. Use Add image or video or Change image or video to select the clip.
A video opens Choose your loop, where you can preview and trim it. Set Start and End to the section you want behind the music, then click Use video background. To revisit those choices, use Trim / loop on the background's media card.
Trimming the background does not trim the song. In the example, the background starts at its own second one while the exported audio section begins at song time zero. Choose the music's export range separately if you are making a short promotional clip.
3. Decide what happens when the clip ends
A short video does not have to match the song's duration. The background controls offer two behaviors:
| Choice | What happens after the selected video section |
|---|---|
| Loop it | The selected background section repeats while the song continues |
| Hold the last frame | The background stops near the end of the selection while the visualizer continues |
With Loop it, our two-second selection repeats across the six-second example. It returns from the end of the selected section to its beginning. This is a repeat, not an automatic crossfade or a guarantee of a seamless loop. Look closely at that join: a person changing position or a camera moving between mismatched frames can make the restart obvious.
Choose a steadier section, prepare a loop in another editor, or use Hold the last frame when the restart distracts from the music.
The same 00:01–00:03 background selection in hold mode. Its motion stops after roughly two seconds of song playback; the bars keep reacting to the recording. This second native Realtime export also contains no audio track.
Holding the background does not pause or loop the song. The music loop guide explains the separate behavior of preview loops and exported audio.
4. Keep titles and bars readable throughout the shot
A composition can look clear on its first frame and become unreadable when a bright object moves behind the title. Play the entire selected background section while checking the layout.
Select the background and adjust Dim when the picture competes with the foreground. The example uses 0.25. Start with a modest amount: the aim is to preserve useful picture detail while giving the title and bars enough contrast.
Place the title over a calm area and move the spectrum away from faces, instrument details, or lettering already in the footage. A small, bright spectrum over a dark lower area often leaves more of the shot visible than large bars through the middle. Check the strongest musical passage, because taller peaks need more room.
For the first pass, keep extra shake, flashes, and heavy glow restrained. The footage already supplies motion. You can use a continuous waveform instead of frequency bars when that better suits the design; the waveform and spectrum guide explains the difference.
View the result at phone size as well as full-screen. Keep the artist and title large enough to read, and recheck their position after any aspect-ratio change.
5. Export with Realtime and open the saved test
Choose Export video and confirm the shape, resolution, frame rate, and available format. Video backgrounds currently require Realtime so their playback can follow the song. Fast Render and release packs use image backgrounds instead.
Keep the editor tab visible and the computer awake during recording. Realtime runs at playback speed, and switching away from the tab can stop the export. Format availability depends on the browser; check export compatibility and the choices offered for the current project.
Use Export 5-second test before recording a whole song. If you want a particular passage, confirm the test range displayed in the dialog. Open the downloaded file and check:
- The expected song section plays, with no camera audio mixed in.
- The background moves, repeats, or holds as intended.
- The loop join and the song's ending look deliberate.
- Titles stay readable and strong bar peaks leave the subject clear.
- The file opens in the player or publishing workflow you plan to use.
The examples here verify short Realtime MP4 recordings in desktop Chromium. They do not establish full-song performance on every device. For a long release, test a demanding section at the intended resolution before starting the complete export.
Troubleshooting the background
| Problem | What to check |
|---|---|
| The background clip's sound is missing | Clip audio is muted in this workflow. Load the song separately. If the saved video is also silent, follow the no-sound export checks |
| The background stops while the bars continue | Check whether Hold the last frame is selected |
| The picture jumps every few seconds | Inspect the join between the selected clip's End and Start |
| The subject disappears after changing shape | Recheck the background crop and rebuild the foreground placement |
| Fast Render is unavailable | Use Realtime with video, or switch to an image background |
| The clip will not open | Try a smaller H.264 MP4 that the browser can decode |
The media is processed locally in your browser. Account and checkout services still need the network; local video processing does not mean the entire site works offline.
VisualizerWave is $19 once, with unlimited exports. Create a visualizer with your own background video.